目次

01.日本語化

作成したWindows 11 開発環境の日本語化を行います。
windows:hyper-v:test-env:hyper-v-testenv0101.png

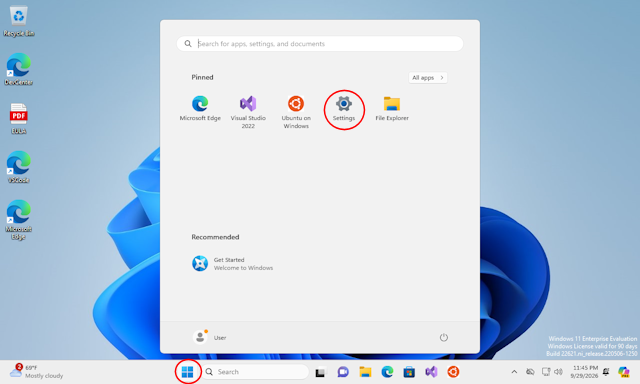
スタートメニュー

スタートメニューから『Settings』をクリックします。

windows:hyper-v:test-env:hyper-v-testenv0102.png

Settings

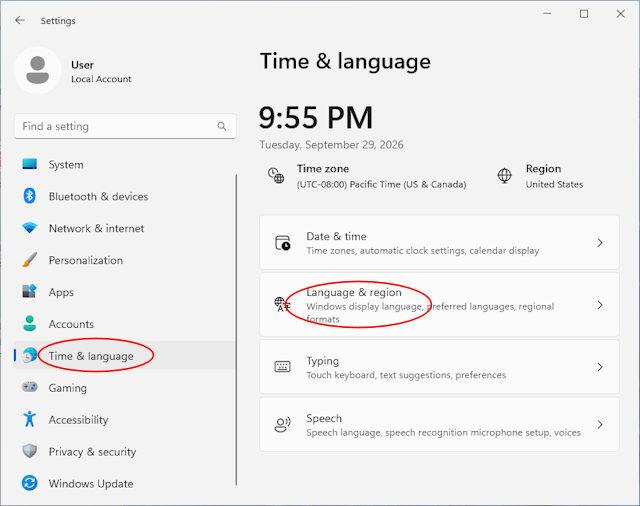
『Time & language』から『Language & region』をクリックします。
windows:hyper-v:test-env:hyper-v-testenv0103.png

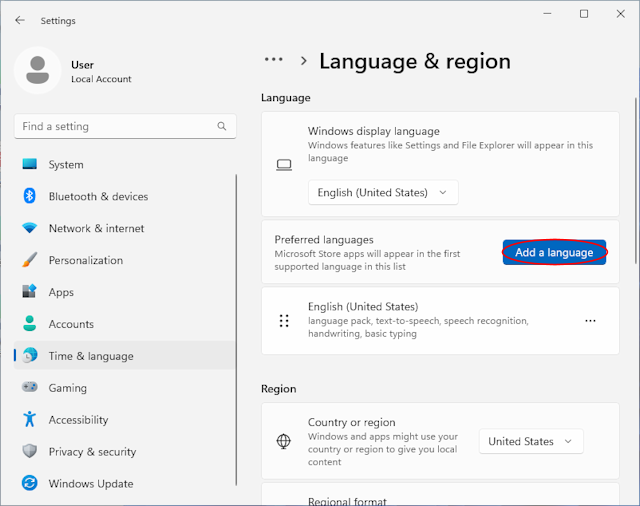
Language & region

『Add a language』をクリックします。

windows:hyper-v:test-env:hyper-v-testenv0104.png

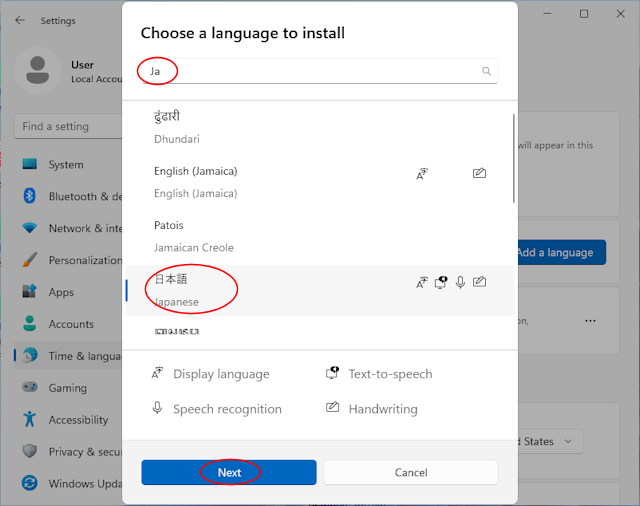
Choose a language to install

検索ボックスに『Ja』を入力し『日本語』を選択します。

『Next』で次に進みます。
windows:hyper-v:test-env:hyper-v-testenv0105.png

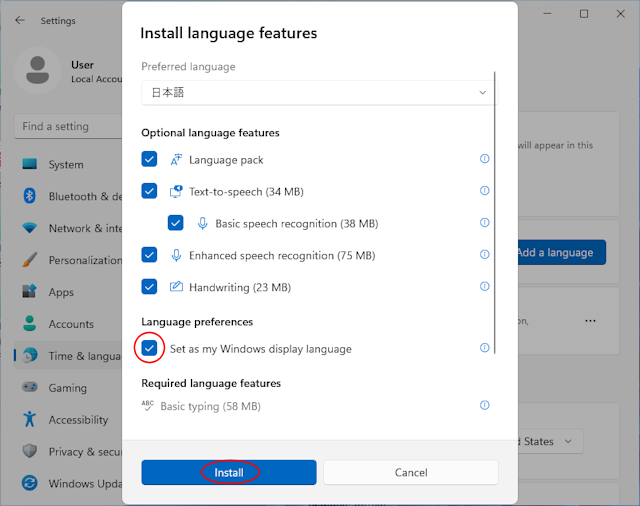
Install language features

『Set as my Windows display language』に✅を入れます。

『Install』で日本語パックをインストールします。
windows:hyper-v:test-env:hyper-v-testenv0106.png

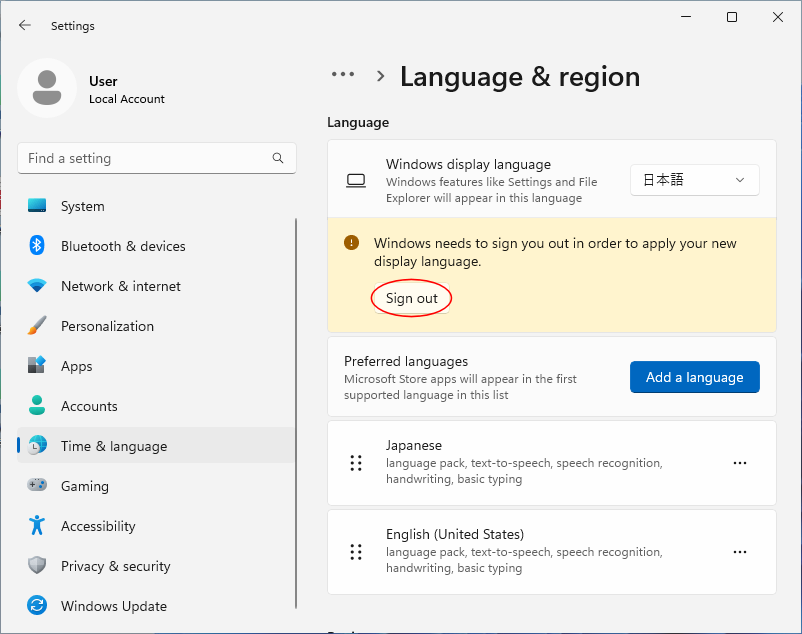
Language & region

インストールが完了すると『Sign out』が表示されますのでクリックします。

『Sign out』後、再度『Sign in』します。

システムロケールの変更
windows:hyper-v:test-env:hyper-v-testenv0111.png

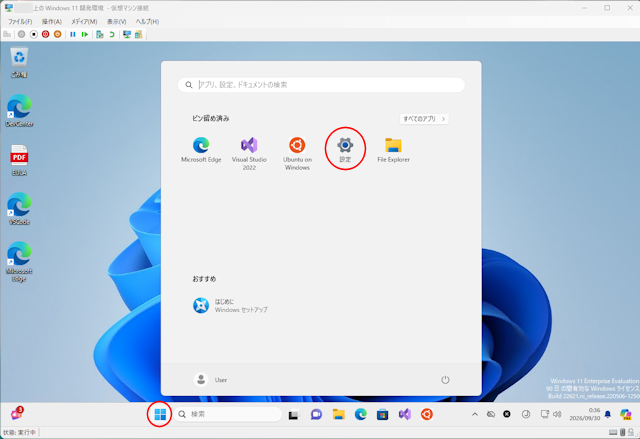
スタートメニュー

再サインイン後、スタートメニューから『設定』をクリックします。

windows:hyper-v:test-env:hyper-v-testenv0112.png

Settings

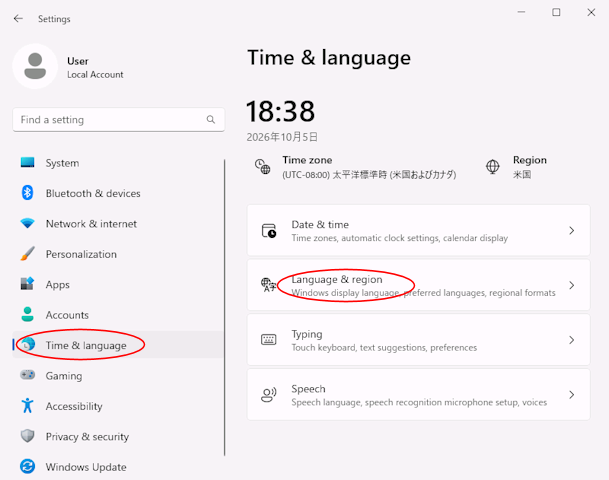
『Time & language』から『Language & region』をクリックします。
※タイミングによっては『時刻と言語』『言語と地域』になっています。
windows:hyper-v:test-env:hyper-v-testenv0113.png

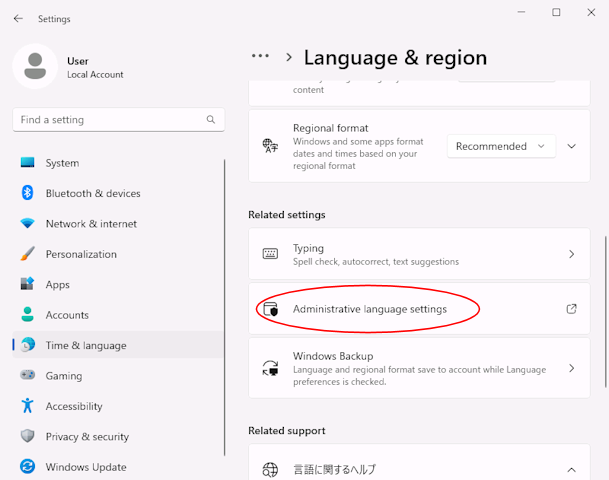
Language & region

『Administrative language settings』をクリックします。
※タイミングによっては『管理用の言語の設定』になっています。
windows:hyper-v:test-env:hyper-v-testenv0114.png

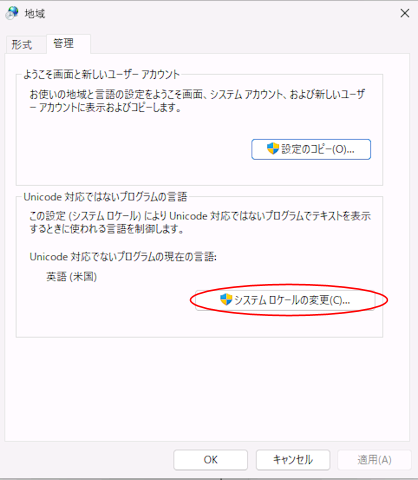
地域

『システムロケールの変更(C)…』をクリックします。

windows:hyper-v:test-env:hyper-v-testenv0115.png

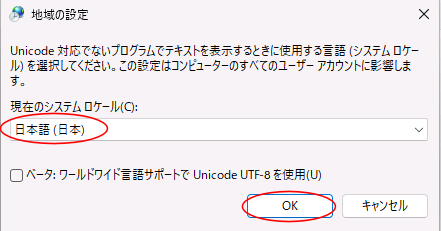
地域の設定

現在のシステムロケール(C)を『日本語(日本)』に変更します。

『OK』で閉じます。
windows:hyper-v:test-env:hyper-v-testenv0116.png

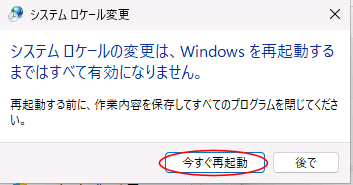
システムロケールの変更

『今すぐ再起動』をクリックします。

再起動後、再度『Sign in』します。

タイムゾーンの変更

windows:hyper-v:test-env:hyper-v-testenv0111.png

スタートメニュー

再サインイン後、スタートメニューから『設定』をクリックします。

windows:hyper-v:test-env:hyper-v-testenv0121.png

設定

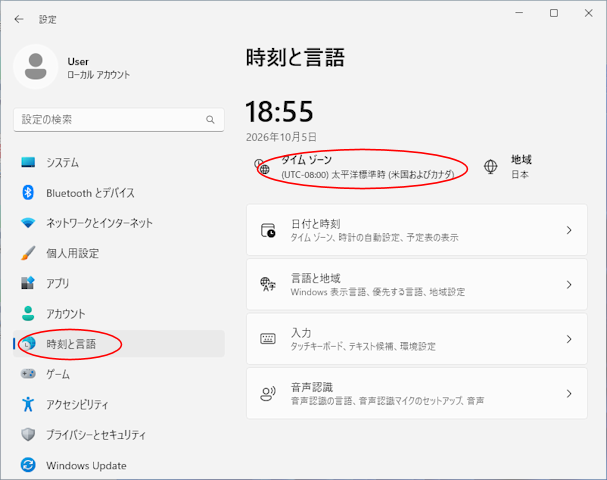
『時刻と言語』から『タイムゾーン』をクリックします。

windows:hyper-v:test-env:hyper-v-testenv0122.png

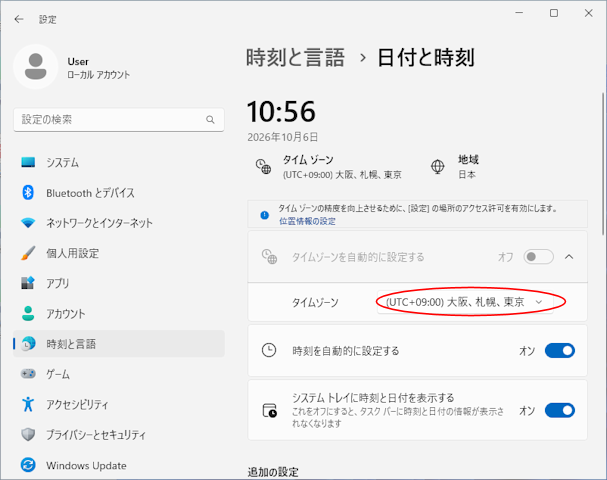
日付と時刻

タイムゾーンを『(UTC+09:00) 大阪、札幌、東京』に変更します。

キーボードの変更
windows:hyper-v:test-env:hyper-v-testenv0131.png

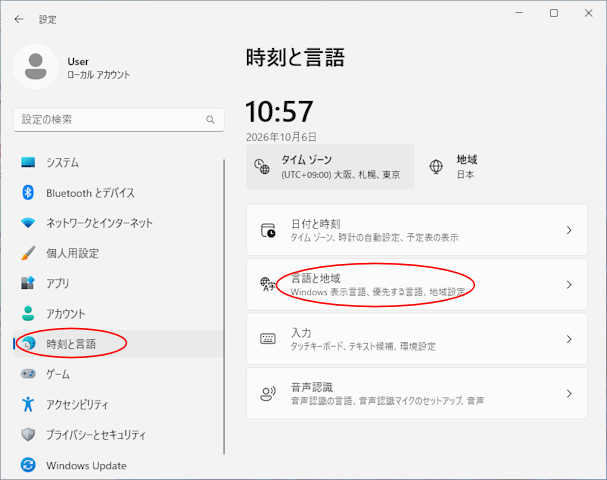
設定

『時刻と言語』から『言語と地域』をクリックします。

windows:hyper-v:test-env:hyper-v-testenv0132.png

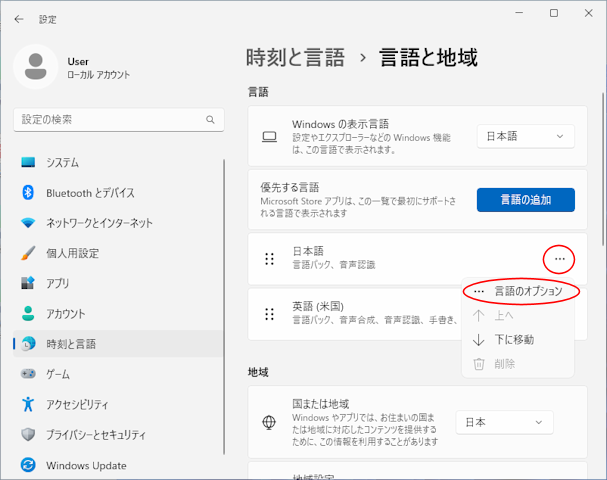
言語と地域

『日本語』の三点リーダーから『言語のオプション』をクリックします。

windows:hyper-v:test-env:hyper-v-testenv0133.png

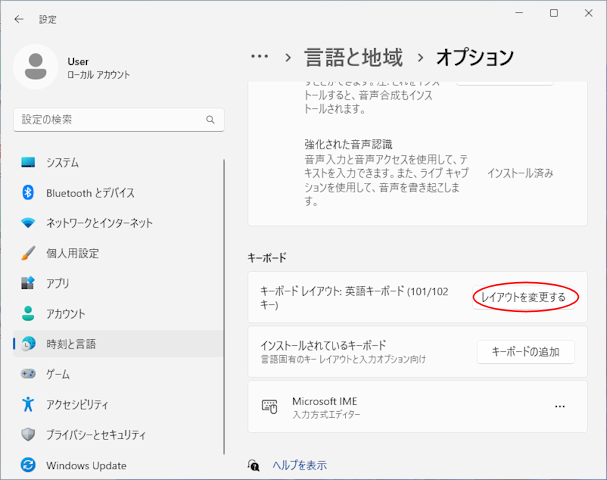
オプション

『キーボード』の『レイアウトを変更する』をクリックします。

windows:hyper-v:test-env:hyper-v-testenv0134.png

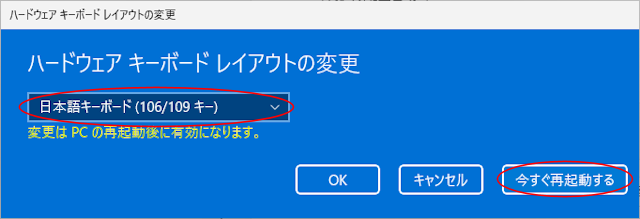
キーボードレイアウトの変更

『日本語キーボード(106/109 キー)』を選択します。

『今すぐ再起動する』をクリックします。

※再起動後、Windows 11 開発環境をシャットダウンします。

チェックポイントの作成
windows:hyper-v:test-env:hyper-v-testenv0141.png

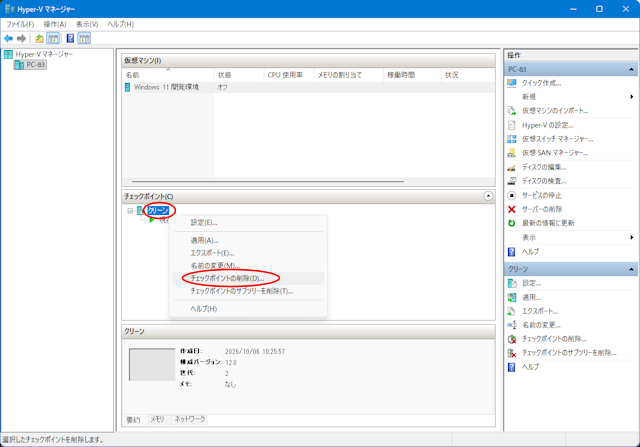
Hyper-Vマネージャー

Hyper-Vマネージャーから日本語化前のチェックポイントを右クリック➡『チェックポイントの削除(D)…』で日本語化前のチェックポイントを削除します。
windows:hyper-v:hyper-v-testenv0011.png

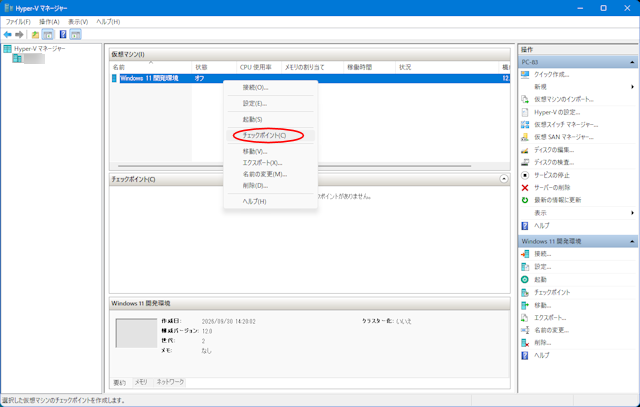
Hyper-Vマネージャー

Hyper-Vマネージャーの仮想マシンを右クリック➡『チェックポイント(C)』で日本語化後のチェックポイントを作成します。